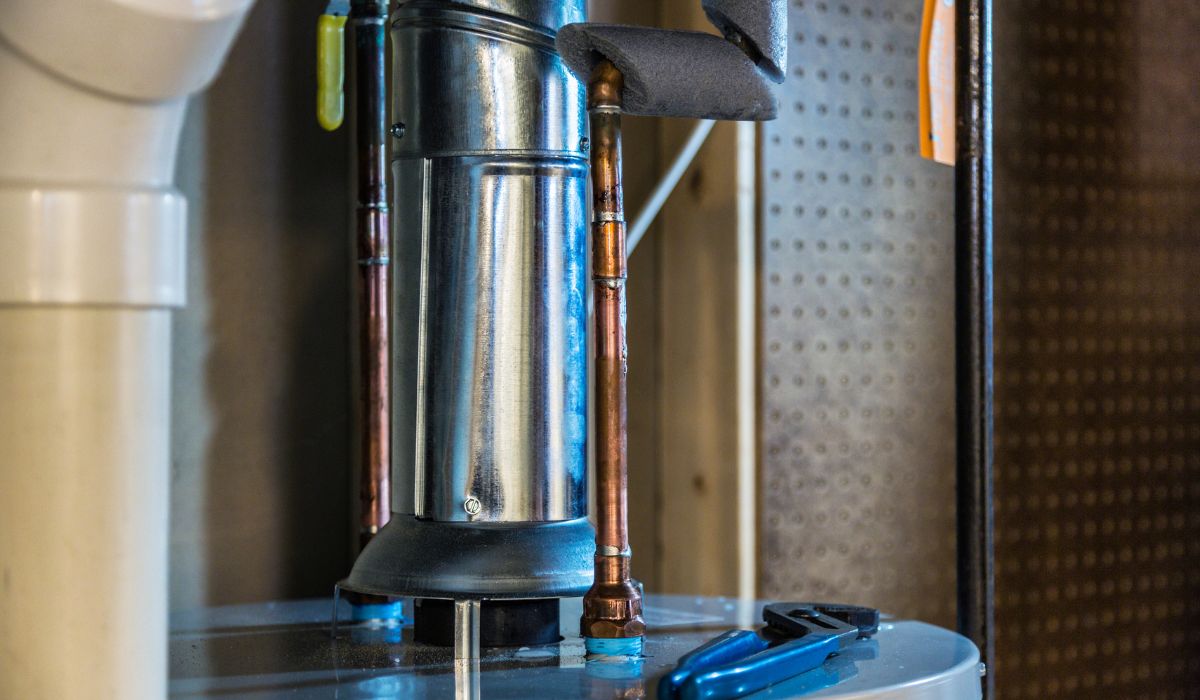
Without proper venting, the hot exhaust gases produced by gas water heaters cannot escape properly, leading to a dangerous buildup of carbon monoxide (CO) and other toxic gases in your basement. This article will walk you through all the essential steps for venting a gas water heater here, as well as its numerous advantages. Proper Venting of Gas Water HeatersVenting is an integral component of any gas water heater system as it serves multiple essential purposes. Primarily, ventilation ensures the safe removal of exhaust gases produced during combustion. Gas-fired water heaters utilize natural draft or power vent mechanisms to extract these fumes from their combustion chamber and expel them outside your home. Proper ventilation is important to protect against carbon monoxide (CO), an odorless and potentially lethal gas produced during incomplete combustion processes. CO poisoning poses serious health risks, including headaches, dizziness, nausea, confusion, and even death in severe cases of exposure. Benefits of Venting a Gas Water Heater in the BasementVenting your gas water heater in your basement offers several advantages that make it an ideal location for installation. Firstly, basements typically provide ample space and installation flexibility due to their larger size than other areas in your home. This allows for easily incorporating necessary venting components without compromising safety or efficiency. A basement installation also allows you to utilize gravity's natural flow when utilizing a natural draft or atmospheric venting system. As hot exhaust gases rise and exit through the vertical vent pipe, they benefit from the assistance of gravity, which aids in their expulsion. Additionally, basements often have access to existing chimneys or common vent configurations connected to other gas appliances, simplifying installation and potentially minimizing costs. Moreover, locating your gas water heater in the basement helps to minimize its impact on occupied living spaces. Since exhaust gases are safely vented outside, you can avoid any discomfort or health risks associated with inhaling these fumes. The basement's cooler environment also assists in dissipating excess heat produced by the water heater without affecting the overall temperature of your home. Recognizing the importance of proper ventilation for gas water heaters is crucial to ensure a safe and efficient operation. Venting your gas water heater in the basement offers several benefits, such as installation flexibility, ease of access to existing venting systems, improved safety by mitigating CO exposure risks, and reduced impact on occupied living spaces. In our upcoming sections, we will delve deeper into understanding different types of vents and their installation processes. Understanding Gas Water Heater VentilationTypes of gas water heater vents (natural draft vs. power vent)When venting a gas water heater in your basement, there are two main types of venting systems: natural draft and power vent. Natural draft vents rely on the natural buoyancy of hot gases to push them up through the flue pipe and out of your home. They require proper airflow and ventilation to operate efficiently. On the other hand, power vents, also known as induced draft or fan-assisted vents, utilize a blower or fan to propel exhaust gases outside. Power venting offers more flexibility regarding installation options, such as using PVC pipes instead of traditional metal flue pipes. Importance of following manufacturer's guidelines for ventingRegardless of the type of gas water heater you have, following the manufacturer's guidelines for proper venting is crucial. Manufacturers design their products with specific ventilation requirements to ensure safe and efficient operation. Deviating from these guidelines can lead to performance issues, increased energy consumption, potential damage to the water heater itself, or even safety hazards like carbon monoxide poisoning. Therefore, always refer to the manufacturer's instructions or consult a professional when installing or modifying a water heater ventilation system. Safety considerations when venting a gas water heaterSafety should be paramount when dealing with water heater venting systems in your basement. First and foremost, ensure you are working with an appropriate fuel type (natural gas or a propane furnace) designated for your specific model and region. Adequate ventilation prevents harmful gases from accumulating indoors; hence, it is essential to ensure proper airflow and clearance around all components involved in the system. Additionally, consider potential obstructions that could interfere with hot air rising naturally or obstruct the venting path. A vent elbow may be required to redirect the vent pipe around obstacles. Always prioritize the safety of your household by adhering to local codes and regulations, and consider consulting a professional if you are uncertain about any aspect of water heater venting. This section explored the types of gas water heater vents, highlighting natural draft and power vent systems. We emphasized the importance of following the manufacturer's guidelines for proper venting and discussed various safety considerations that should never be overlooked when dealing with hot water heater ventilation in your basement. Understanding these aspects is crucial before proceeding with the next steps of selecting and installing an appropriate vent system for your gas water heater. Assessing Basement Conditions for VentilationMeasuring the size and layout of the basement areaBefore venting a gas water heater in your basement, it is crucial to assess the size and layout of the area. Measure the dimensions of the space to determine the available room for installation. Consider ceiling height, ensuring sufficient vertical clearance to accommodate the vent system. Accurate measurements will help you select appropriate vent components and plan for their installation. Identifying potential obstructions or limitations for vent installationOnce you have measured the basement area, carefully identify potential obstructions or limitations that may affect proper vent installation. Look for structural elements, such as beams or columns, that could obstruct a direct path for the vent duct. Also, consider other utilities, such as electrical wiring or plumbing lines, that may be present in close proximity to where you plan to install the ventilation system. Identifying these obstacles beforehand will allow you to make necessary adjustments and ensure a safe and efficient installation process. Analyzing existing ventilation systems in the basementAnalyze any existing ventilation systems already present in your basement. These systems include exhaust vents from appliances like dryers or furnaces. Understanding their locations will help you determine if they can be utilized or if separate venting needs to be installed specifically for your gas water heater. Additionally, take note of any windows or doors that could provide alternate paths for hot air rises and exhaust gas dispersion when considering proper venting options. By thoroughly assessing these three aspects - measuring space dimensions, identifying potential obstructions, and analyzing existing ventilation systems - you will gain valuable insights into how to best design and implement a suitable ventilation system for your gas water heater in your basement. This proactive approach ensures tankless water heaters proper functioning and safeguards against carbon monoxide buildup by effectively removing exhaust gases emitted by your gas-fired water heater. Selecting the Right Venting SystemNatural Draft Venting: Embracing TraditionRegarding natural draft venting, we delve into a time-honored method of expelling combustion byproducts from our gas water heaters. This system comprises essential components such as flue pipes and a chimney, working harmoniously to ensure safe and efficient ventilation. The flue pipes, usually made of durable metal, provide a passageway for the combustion gases to exit the water heater and travel toward the chimney. Proper sizing these flue pipes is crucial to maintain an optimal flow rate. Calculating the size is influenced by key factors such as the BTU rating of your water heater and its length requirements. It's important to consult manufacturer guidelines or seek professional advice to identify the most accurate pipe size for your specific setup. In addition to sizing considerations, ensuring adequate clearance from combustible materials is paramount for safety reasons. While natural draft vents are designed to efficiently remove hot gases produced during combustion, they can radiate heat in close proximity to nearby objects if not properly insulated. Therefore, maintaining ample space between flammable materials and your vent system prevents potential fire hazards. Power Venting: Empowering EfficiencyPower venting presents an innovative alternative that expedites removing combustion byproducts from your gas water heater while offering distinct advantages over traditional natural draft vents. This system harnesses a blower unit with PVC pipes to facilitate efficient airflow and ventilation. The blower unit propels exhaust gases through a dedicated vent pipe while drawing fresh air into the water heater's combustion chamber. Understanding how power vents operate allows us to appreciate their functionality better. By utilizing electrical power, these units offer greater flexibility when determining suitable installation locations within your basement space compared to relying solely on gravity-driven natural draft vents. Considerations for electrical connections and the availability of a power source are pivotal in positioning your power vent system effectively. While power venting provides numerous benefits, weighing its advantages against natural draft vents is essential. One notable advantage is the flexibility to install a power vent in areas where conventional venting may not be feasible due to space constraints or limitations in basement layouts. However, it's important to note that power vents require a continuous electricity supply, making them dependent on an uninterrupted power source. Additionally, their installation and maintenance costs may be higher compared to natural draft vents. Therefore, carefully considering factors such as cost, convenience, and the specific needs of your gas water heater should guide your decision when choosing between natural draft or power venting systems. Stay tuned for the next section on installing the chosen direct venting system in your basement! Installing the Vent System in Your BasementPreparing Necessary Tools and MaterialsBefore embarking on the installation process, gather all the tools and materials required for a successful venting system installation. Some essential tools include a tape measure, pipe cutter or hacksaw, adjustable wrenches, screwdrivers, and drill with appropriate bits, levels, and high-temperature silicone or metal tape for sealing joints. Additionally, ensure you have the necessary materials such as flue pipes or PVC pipes (depending on whether you're installing a natural draft or power vent system), chimney cap or termination hood (for natural draft vents), blower unit (for power vent systems), mounting brackets or straps, and any necessary connectors and fittings. Steps to Install a Natural Draft Vent System
Steps to Install a Power Vent System
Use approved connectors and fittings to ensure a secure and tight fit.
Ensure all connections are properly grounded for safety.
Safe Ventilation: Contact New West Plumbing for Gas Water Heater Installation!Efficiently venting your gas water heater in your basement is crucial for the safe operation of this essential appliance. By following manufacturer guidelines and understanding the specific requirements of natural draft and power vent systems, you can ensure proper installation in line with safety standards. Whether you opt for a natural draft or power vent water heater, taking meticulous steps to measure, cut, and connect flue pipes or PVC pipes while effectively sealing joints will contribute to an efficient water heater venting system. With careful attention to detail during installation and thoughtful consideration of factors like positioning equipment near your water heater and mounting appropriately, you can achieve optimal performance from your gas water heater while safeguarding your home and loved ones with proper ventilation. Ready to install or upgrade your water heater venting system? Contact New West Plumbing in New Westminster, WA, for a free estimate. Our experts will ensure your gas water heater is vented safely and efficiently, providing peace of mind for your household. 
The freezing of pipes during cold weather can lead to significant problems and damage if not addressed promptly and effectively. Homeowners and tenants alike must understand how to deal with frozen pipes, as this knowledge can save them from potential headaches, expenses, and inconveniences. In this article, we will explore the significance of understanding the proper steps to take when faced with frozen pipes and provide an overview of the potential risks and damages this common winter occurrence can cause. Importance of Understanding How to Deal with Frozen PipesThough frozen pipes may seem like an inconvenience at first, they pose serious threats if mishandled improperly. One major risk associated with using open flame devices such as propane torches for thawing purposes is that they could cause fires or explosions within enclosed spaces if mishandled improperly. Beyond fire hazards, frozen temperatures pose a great risk of pipe bursts. When water freezes inside a pipe, it expands, exerting pressure against its walls and forcing them to burst. If the pressure becomes too great, it may cause your pipe to burst or crack, potentially flooding your home or office space when temperatures warm back up again, and water starts circulating through your plumbing system. Frozen Pipes: An Overview of the Potential Risks and DamagesFrozen pipe consequences extend far beyond immediate physical damage--they also present potential threats associated with water damage and mold growth that could have long-term adverse impacts on both health and property values. When pipes freeze in unheated spaces such as basements or crawlspaces, prompt action must be taken before they burst and leave standing water behind, which provides ideal breeding grounds for mold growth. Mold can damage not only the structure of your property but also have adverse health impacts, potentially leading to allergies or other respiratory ailments. Furthermore, frozen pipes can interfere with daily activities and pose additional threats - both can become hazards when inaccessible for repairs. Imagine having to wake up on a frosty morning to no water coming out of the faucets due to frozen water lines - an issue that will require time and resources to be dedicated to solving. This situation can be both aggravating and time-consuming, requiring your attention and resources. Understanding how to deal with frozen pipes is vital for minimizing potential dangers and protecting your property, health, and overall peace of mind. With that in mind, let us investigate more deeply the causes and signs of frozen pipes to arm ourselves with knowledge and take preventative steps as needed. Understanding the Causes and Signs of Frozen PipesThe Science Behind Frozen Pipes: Unveiling the Cold TruthUnderstanding why water pipes freeze in cold weather requires delving into a fascinating scientific process. When temperatures drop, the water inside pipes can reach a freezing point, causing it to transform into solid ice. As the water freezes, it expands, exerting pressure on the pipe walls. This pressure can eventually lead to cracks or bursts in the pipe if not addressed promptly. It is crucial to comprehend this process to effectively prevent and mitigate frozen pipes. Signs of Trouble: Recognizing When Pipes Are FrozenAwareness of common signs indicating that pipes might be frozen is essential for early detection and proactive action. If you turn on a faucet during cold weather and only a trickle or no water comes out, this could indicate a possible ice blockage in your plumbing system. Additionally, suppose you notice unusual sounds like banging or knocking from behind walls when running faucets or flushing toilets. In that case, it might signal an ice blockage within a pipe. Being vigilant about these signs will help you identify potential issues before they escalate into more severe problems. The causes and signs of frozen pipes are essential to grasp when dealing with this winter nuisance effectively. Understanding how water freezes inside pipes due to cold weather conditions enables homeowners to take preventive measures and minimize potential damage. Recognizing early signs such as reduced water flow or peculiar noises allows prompt action, ensuring appropriate thawing techniques are employed before further harm occurs. By comprehending the science behind frozen pipes and staying vigilant for warning signals, individuals can protect their homes from unnecessary headaches caused by winter's icy grip. How To Prevent Your Pipes From FreezingInsulating Exposed Pipes in Vulnerable AreasInsulation is paramount to protect exposed pipes in vulnerable areas, such as crawl spaces or unheated basements. Insulating these pipes is a barrier against the frigid temperatures that can cause them to freeze. One effective method is using pipe insulation sleeves, widely available at hardware stores. These sleeves are designed to fit snugly around the pipe and provide an extra insulation layer. Alternatively, heat tape can be used along the length of the pipe. This electrical heating element warms the pipe, preventing freezing even in extremely cold conditions. Remember to follow the manufacturer's instructions carefully when installing heat tape. Wrapping Pipes with Towels or Blankets During Extreme Cold SpellsDuring particularly harsh winter weather, when temperatures plummet below freezing and threaten to turn your water supply into ice-cold slumber, an additional measure of protection can be applied by wrapping towels or blankets around exposed pipes. This simple yet effective technique helps to insulate and retain heat within the pipes, reducing the risk of frozen water pipes considerably. When employing this method, ensure that you use thick towels or blankets that can effectively trap warmth and secure them tightly with zip ties or duct tape. However, be cautious not to wrap any flammable material near heat sources like space heaters. Keeping Indoor Temperatures Consistent and Warm Throughout Winter MonthsMaintaining consistent indoor temperatures throughout winter is essential for preventing frozen pipes. Set your thermostat above freezing point (32°F/0°C) at all times and avoid significant temperature fluctuations as they can contribute to frozen water pipes. Even when you are away from home, it is imperative to keep the heat on, albeit at a lower setting. This consistent warmth ensures that the ambient temperature remains above freezing, mitigating the risk of burst pipes when you return. Employing a programmable thermostat can help regulate temperatures efficiently and ensure your dwelling remains cozy and free from the menace of frozen water pipes. Using Space Heaters Strategically in Colder Areas of the HouseIn colder areas of your house, such as attics or basements with poor insulation, strategically utilizing space heaters can provide additional protection against frozen pipes. Placing a space heater near exposed or vulnerable pipes helps to maintain a warmer environment and prevent freezing. However, exercise caution when using space heaters and ensure they are positioned safely away from flammable material or potential hazards. Following manufacturer recommendations regarding usage guidelines and safety precautions is crucial. By implementing these preventive measures diligently, you can significantly reduce the chances of encountering frozen water pipes during winter's icy grip. Remember, prevention is key in avoiding the headaches caused by burst pipes and the potential property damage accompanying them. Steps to Take When You Suspect Frozen PipesWhen faced with the possibility of frozen pipes, it is crucial to take immediate action. The first step is to identify the frozen pipe(s) location. Begin by checking all faucets for reduced or no water flow, a common sign of a frozen pipe. If you notice any issues with water flow, it is time to start tracing exposed pipes in unheated areas such as basements, attics, or crawl spaces. These areas are particularly susceptible to freezing temperatures and should be inspected thoroughly. Once you have located the frozen area, it is important to open faucets to relieve pressure within the system and minimize potential damage once thawed. Thawing Techniques for Frozen PipesSafely thawing accessible, visible frozen pipes:If you can easily access and see the frozen pipe, there are a couple of safe thawing techniques you can employ. Firstly, using a hairdryer on a low heat setting can help gently warm the pipe, starting from the faucet end. It's important not to use high heat as this may cause damage to both plastic and metal pipes. Secondly, applying warm towels soaked in hot water along the length of the pipe can also aid in the thawing process. This method helps in transferring heat to the frozen area effectively. Thawing inaccessible or hidden frozen pipes:For inaccessible or hidden frozen pipes that are not easily reachable or visible, alternative methods need to be used for thawing. One effective approach involves turning up indoor heating to help gradually thaw hidden sections within walls or floors. It's important not to drastically increase temperature settings but rather allow warm air circulation throughout your home for gradual thawing. Another option for inaccessible areas involves using an infrared lamp directed toward suspected locations where pipes may be frozen. The focused heat emitted by the lamp aids in thawing the frozen area safely without causing any damage. However, it is essential to exercise caution and ensure that flammable materials are kept away from the lamp to prevent any potential accidents. Frozen Pipes? Act Fast! Contact New West Plumbing Today!Dealing with frozen pipes can be a stressful experience, but by taking prompt action and following the correct steps, you can minimize the risk of a burst pipe and costly water damage. Identifying the location of frozen pipes, checking faucets for reduced water flow, and tracing exposed pipes in vulnerable areas are vital in assessing the situation accurately. Thawing methods such as using a hairdryer or warm towels on accessible pipes and indoor heating or infrared lamps on inaccessible areas can safely restore water flow without causing further damage. Always prioritize safety when handling frozen pipes and seek professional assistance if needed. With these precautions, you can navigate through freezing temperatures confidently while safeguarding your home's plumbing system. Are you uncertain about what to do if pipes are frozen, or do you need expert assistance to prevent frozen pipes? Contact New West Plumbing in New Westminster, BC, for professional plumbing solutions and ensure your home remains protected against the challenges of cold weather. 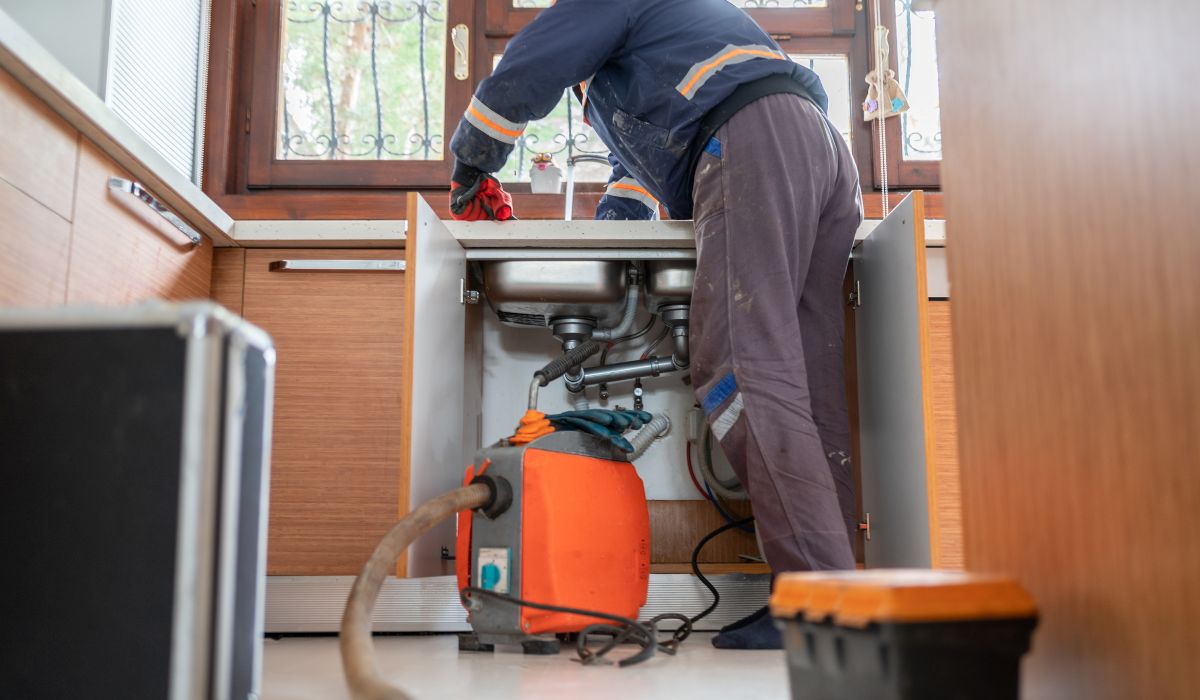
Staying on top of our drainage systems is essential to creating a healthy living environment, yet when faced with blockages or clogs, many homeowners turn to DIY methods in an attempt to save money and quickly resolve their problem - unfortunately, this often leads to additional complications and expensive repairs in the long run. In this article, we'll examine why hiring professional drain cleaners may be wiser than trying DIY solutions. By understanding the importance of keeping drains clear and recognizing their limitations as DIY solutions, we can see why professional cleaners provide invaluable assistance in restoring proper functioning to drainage systems. Brief overview of the importance of maintaining a clean and functional drainage systemA properly functioning drainage system plays a crucial role in our daily lives that we may not fully appreciate until something goes awry. Drains carry away wastewater from various sources, such as sinks, showers, toilets, washing machines, and dishwashers. When these drains work efficiently, they prevent water from pooling up or flooding our homes – situations that can cause extensive damage to furniture, flooring, and walls and even compromise the structural integrity of our properties. Moreover, clean drains help prevent unpleasant odors caused by stagnant water or decomposing matter that accumulates within them over time. By ensuring regular maintenance to keep our drainage systems clean and functional, we promote both hygiene and peace of mind. Mentioning the common tendency to attempt DIY drain cleaningIt's no secret that homeowners often try their hand at resolving drain clogs independently before considering professional assistance. Armed with plungers or chemical drain cleaners bought from local hardware stores or supermarkets, they hope for a quick fix without much hassle or expense. However tempting this may be due to convenience or budgetary concerns, it's important to recognize the limitations of such DIY attempts. While plungers can be effective for minor toilet clogs, they often fail to address deeper or more complex blockages. Chemical drain cleaners, on the other hand, can contain harsh and corrosive substances that may damagepipes and harm the environment. Furthermore, these products provide temporary relief rather than a long-term solution. It's essential for homeowners to recognize when their DIY efforts are insufficient and seek professional help before the problem escalates. Introducing the idea of hiring a professional drain cleaner insteadWhen faced with persistent drain clogs or more serious plumbing issues, calling upon the expertise of a professional drain cleaner or plumber is an investment in both our homes and our peace of mind. These skilled technicians possess an extensive knowledge base that allows them to diagnose and resolve various types of drain clogs efficiently. Equipped with specialized tools such as drain snakes or augers, they can navigate through pipes of varying lengths and diameters to remove stubborn blockages that may be hidden deep within our drainage systems. Additionally, professional drain and pipe cleaners have access to high-pressure water jetting machines that can effectively clear debris and buildup without causing any damage to the pipes' interior surfaces. By understanding the inadequacies of DIY methods and acknowledging the benefits of hiring professionals, we position ourselves for effective solutions that save us money in the long run while ensuring the optimal functionality of our drainage systems. Expertise and experience in dealing with various types of clogs and blockagesOne of the primary advantages of hiring a professional plumber or drain cleaner is their extensive expertise and experience in handling different types of clogs and blockages. Professional plumbers have in-depth knowledge of various drain systems, including those found in kitchens, bathrooms, and outdoor areas. They understand how different materials, such as grease, hair, or soap scum, can affect drains and cause obstructions. With this knowledge, they are equipped to tackle any kind of clog effectively. In addition to their wide-ranging knowledge, professional plumbers possess the ability to identify underlying issues that may be causing recurring clogs. Sometimes, a seemingly simple shower drain clog can be indicative of a more significant plumbing problem. A proficient drain cleaner will not only fix the immediate issue but also provide insights into potential underlying issues that may require attention to prevent future disruptions. Access to specialized tools and equipmentAnother compelling reason to hire a drain cleaner is their access to specialized tools and equipment designed specifically for the process of clearing stubborn clogs. While DIY enthusiasts may resort to plungers or chemical solutions available over the counter, these methods often fall short when it comes to tackling more complex blockages. Professional plumbers utilize advanced drain snakes and augers capable of reaching deep into pipes where ordinary plungers cannot reach. These tools enable them to retrieve objects or break up tough obstructions efficiently. Additionally, high-pressure water jetting machines are employed for particularly stubborn blockages that require intense force to dislodge debris or built-up residue within the pipes. Furthermore, camera inspection technology has revolutionized the field of drain cleaning by providing precise diagnosis capabilities. Plumbers use small cameras attached to flexible cables that can navigate through the intricate network of pipes while transmitting real-time video footage. This allows them to pinpoint the exact location and cause of a clog, enabling them to devise the most effective solution. Subtopics on Specific Scenarios Where Hiring a Professional is BeneficialComplex or Hard-to-Reach Clogs in Main Sewer LinesWhen faced with complex or hard-to-reach clogs in main sewer lines, attempting DIY solutions can be a recipe for disaster. The potential risks involved are manifold and should not be taken lightly. Firstly, there is the danger of accidentally damaging the sewer pipes themselves. These pipes are crucial for the proper functioning of your drainage system, and any harm caused to them can result in costly repairs or even complete replacements. Moreover, dealing with sewage waste and harmful bacteria lurking within your pipes without proper knowledge and protective gear exposes you to potential health hazards. If chemicals are improperly used or disposed of during DIY attempts at unclogging drains, it can lead to environmental pollution and harm aquatic life. It is clear that entrusting this job to professionals who possess the expertise and experience needed to navigate such complexities ensures both personal safety and environmental responsibility. Preventive Maintenance and Long-Term Cost SavingsRegular professional drain cleaning services offer much more than just fixing clogged kitchen sinks or clearing bathroom drains. By engaging professionals for preventive maintenance of your drainage system, you can avoid major issues down the line that may require expensive emergency plumbing services. Regular inspections and cleanings enable early detection of minor problems before they escalate into larger ones that demand immediate attention. This proactive approach not only saves you money but also ensures that the components of your drainage system enjoy a prolonged lifespan. By keeping drains clean and free from debris buildup, professional drain cleaners help prevent corrosion, leaks, or other structural issues in your pipes over time. Lesser-Known Benefits and Interesting Details about Professional Drain CleanersEco-Friendly Practices Employed by Reputable CompaniesIn addition to their expertise and technical know-how, professional drain cleaners often employ eco-friendly practices that further enhance their appeal. Reputable companies understand the need to minimize their environmental impact and have adopted various measures accordingly. They utilize biodegradable cleaning agents whenever possible, reducing the harmful effects of chemicals on ecosystems. Additionally, some professional drain cleaners employ water conservation techniques such as recycling and reusing water during high-pressure jetting processes. By choosing such environmentally conscious service providers, you not only resolve your drain problems effectively but also contribute to a cleaner and greener planet. Contact New West Plumbing for Hassle-Free Drain Cleaning!Entrusting the task of drain cleaning to professionals offers numerous benefits that surpass the limitations of DIY attempts. The risks associated with complex clogs in main sewer lines, including accidental damage to pipes and exposure to harmful bacteria or sewage waste, should not be taken lightly. Moreover, by opting for preventive maintenance through regular professional cleanings, you can avoid expensive emergency plumbing services and prolong the lifespan of your drainage system components. Additionally, reputable companies that prioritize eco-friendly practices contribute positively towards environmental sustainability. So, don't hesitate to make the smart choice – avoid the temptation to handle drain problems yourself. Instead, contact a reliable drain cleaner like New West Plumbing, serving New Westminster, BC, for a hassle-free and responsible solution. Our experts are armed with the right tools and expertise to get the job done efficiently and effectively. 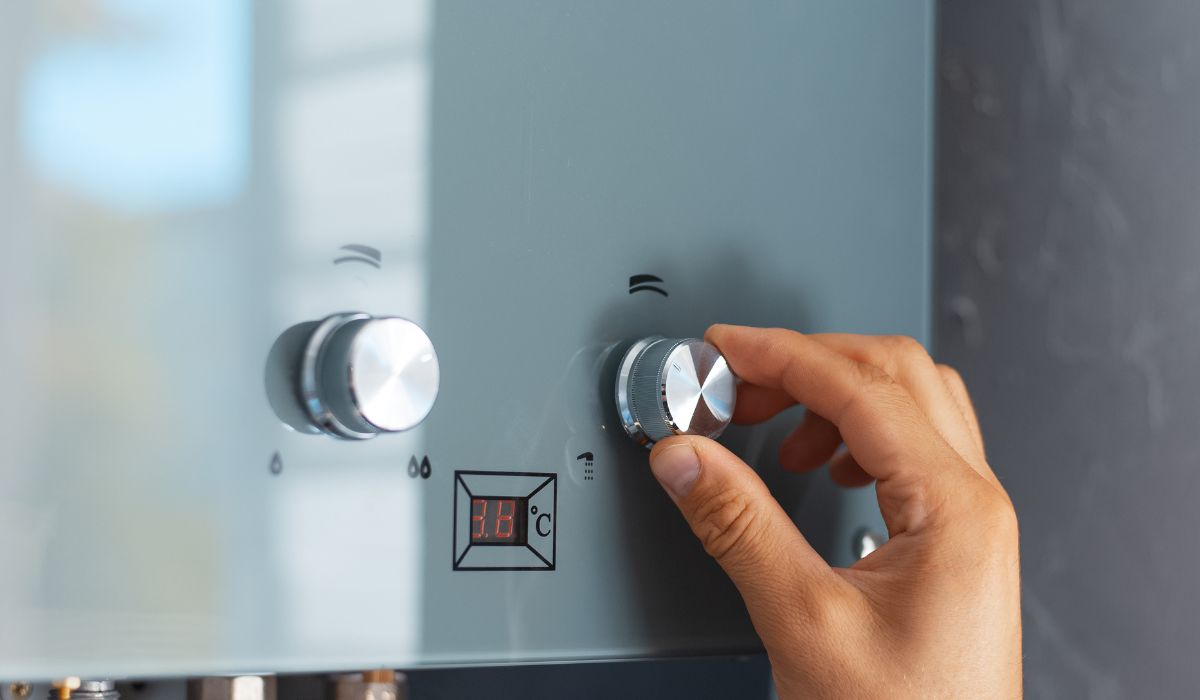
Water heater safety is of utmost importance in every household. Ensuring its proper operation and upkeep ensures an uninterrupted hot water supply and promotes family well-being and security. Unfortunately, many homeowners underestimate the risks water heaters pose and fail to address them promptly if needed. Therefore, before delving into essential safety tips for water heaters, it is vital that they fully comprehend why such precautions must be taken. Importance of Water Heater SafetyWater heater safety should never be underestimated. Water heaters play an essential role in our daily lives by providing hot water for bathing, cooking, and cleaning. Failure to adhere to proper safety measures can have severe repercussions; various sources reported that approximately 5,000 water heater accidents occur annually in the US alone. Overview of Potential Risks Associated with Water HeatersAwareness regarding potential risks associated with water heaters is crucial for maintaining a safe environment within your home. One significant risk is scalding due to excessively hot water temperatures, which can cause severe burns, particularly among children and elderly individuals with sensitive skin. Another hazard lies in gas-powered water heaters, where potential gas leaks pose a threat due to flammability and the release of carbon monoxide gas. This silent killer is odorless and colorless. Additionally, improper installation or neglected maintenance can lead to leaks or even tank explosions caused by excessively high pressure within the unit. General Water Heater Safety TipsLocation and InstallationProper placement away from flammable materials is crucial to ensure water heater safety. It is important to keep the water heater clear of combustible substances such as aerosol bug bombs, gasoline fumes, or flammable liquids. These materials can pose a serious fire hazard if they come into contact with the heat generated by the water heater. Additionally, adequate ventilation requirements must be met to prevent heat buildup and potential combustion issues. Proper airflow around the unit helps dissipate excess heat and reduces the risk of overheating. Furthermore, installation must be carried out by a licensed professional with the necessary expertise and knowledge to adhere to safety guidelines set forth by regulatory bodies like the Consumer Product Safety Commission. Temperature RegulationMaintaining the right temperature on your water heater is paramount for safety purposes. Setting the thermostat to a safe temperature, typically around 120°F or 49°C, helps prevent scalding injuries, which can occur when water temperatures are excessively high. In households with young children or elderly individuals who may have reduced sensitivity to heat, installing anti-scald devices or mixing valves adds an extra layer of protection against burns. These devices work by mixing cold water with hot water before it reaches the tap, ensuring a safer temperature for use. Regular Maintenance and InspectionsRegular maintenance and inspections are essential for prolonged water heater safety. Annually flushing the tank serves two purposes: it removes sediment buildup that can hinder efficiency. It prolongs its lifespan while also reducing potential risks associated with pressure issues. A professional inspection every few years allows for a thorough examination of all components, including residential valves, gas lines (in gas heaters), and pressure relief valves (PRV). Such inspections help identify any leaks, cracks, or corrosion signs, which may lead to malfunction or even catastrophic failure if left unaddressed. By promptly addressing these issues, you can ensure your water heater system's continued safety and efficiency. Gas Water Heater Safety TipsPrevention and Detection of Gas LeaksOne of the key components of gas water heater safety is the prevention and detection of gas leaks. Carbon monoxide detectors should be installed near water heater areas since carbon monoxide is an invisible yet lethal gas produced during combustion processes that could release poisonous levels of CO into the environment. These detectors act as an early warning system, notifying you when an odorless gas is present and alerting you of potential gas leaks - such as an unpleasant rotten egg smell - as soon as they arise. If you smell gas or suspect a leak, it's important not to ignite any open flame or create sparks in the vicinity. Instead, evacuate the area immediately and contact your utility provider for assistance. Ventilation and Combustion Air SupplyProper ventilation and combustion air supply are vital for the safe operation of a gas water heater. Ensuring that the venting system is correctly installed and regularly maintained helps prevent exhaust gases from accumulating inside your home. Blocked or damaged vents can lead to carbon monoxide buildup, posing a serious risk of carbon monoxide poisoning. Additionally, keeping the combustion air supply unobstructed allows for adequate airflow for combustion processes to occur safely. Pilot Light MaintenanceThe pilot light plays a crucial role in igniting the gas burner whenever hot water is needed. Understanding how to relight a pilot light safely if it goes out is an essential skill for homeowners with gas water heaters. Before attempting this procedure, it's important to read your unit's manufacturer instructions carefully for specific guidance tailored to your model. Generally, relighting involves turning off the main burner switch or dial on your water heater, waiting for several minutes to allow any lingering gas fumes to dissipate, locating and following proper relighting instructions near the pilot light assembly or control knob area, and using a long-reach lighter or match to ignite the pilot flame. Remember, if you are unsure about relighting the pilot light or suspect any issues with your water heater, it is always best to consult a professional technician for assistance. By following these gas water heater safety tips, homeowners can mitigate potential risks associated with gas leaks, ensure proper ventilation and combustion air supply, and handle pilot light maintenance appropriately. Maintaining a safe environment around your water heater contributes to the overall well-being of your household while safeguarding you against dangerous situations like carbon monoxide poisoning or gas-related accidents. Electric Water Heater Safety TipsElectrical WiringRegarding electric water heater safety, proper electrical wiring is of utmost importance. During installation, it is crucial to employ the right wiring techniques and materials to ensure the integrity and efficiency of the system. This involves using appropriate gauge wires rated for the load requirements of the water heater, as specified by local codes and regulations. Additionally, all connections should be securely tightened and enclosed in junction boxes to prevent accidental exposure or damage. It is advisable not to plug other high-power appliances to safeguard against overloading circuits (such as refrigerators or air conditioners) into the same outlet as the water heater. This can help distribute electrical load evenly across circuits within your home's electrical system, reducing the risk of tripped breakers or overheating wires. GroundingGrounding plays a vital role in ensuring the safe operation of an electric water heater. It involves connecting the metal components of the water heater, such as tanks andpipes, to a grounding electrode conductor that extends into the ground. The purpose of grounding is twofold: firstly, it helps protect against electric shock by providing a path for stray electrical currents in case of faults; secondly, it helps safeguard against potential equipment damage caused by transient voltage spikes. To establish proper grounding for your electric water heater, consult a qualified plumber or an electrician who can assess your home's electrical system and install any necessary grounding components. Contact New West Plumbing for Electric Water Heater Expertise!Whilst protecting both your home and family is of utmost importance, beginning with your electric water heater, it should also play an integral part. By following these electric water heater safety tips - proper wiring, responsible outlet usage, and efficient grounding techniques - we hope that we have provided essential advice to create a risk-free environment, maintain an efficient hot water system, and create an ideal space to conduct daily activities safely. Contact New West Plumbing at 604-256-5590 today. Our priority is your safety and comfort - so our specialists are on hand to guide you toward informed decisions, address any concerns, and ensure your electric water heater works flawlessly, providing exactly the temperature necessary for daily life. Ensuring Your Peace of Mind in New Westminster is Our Goal! 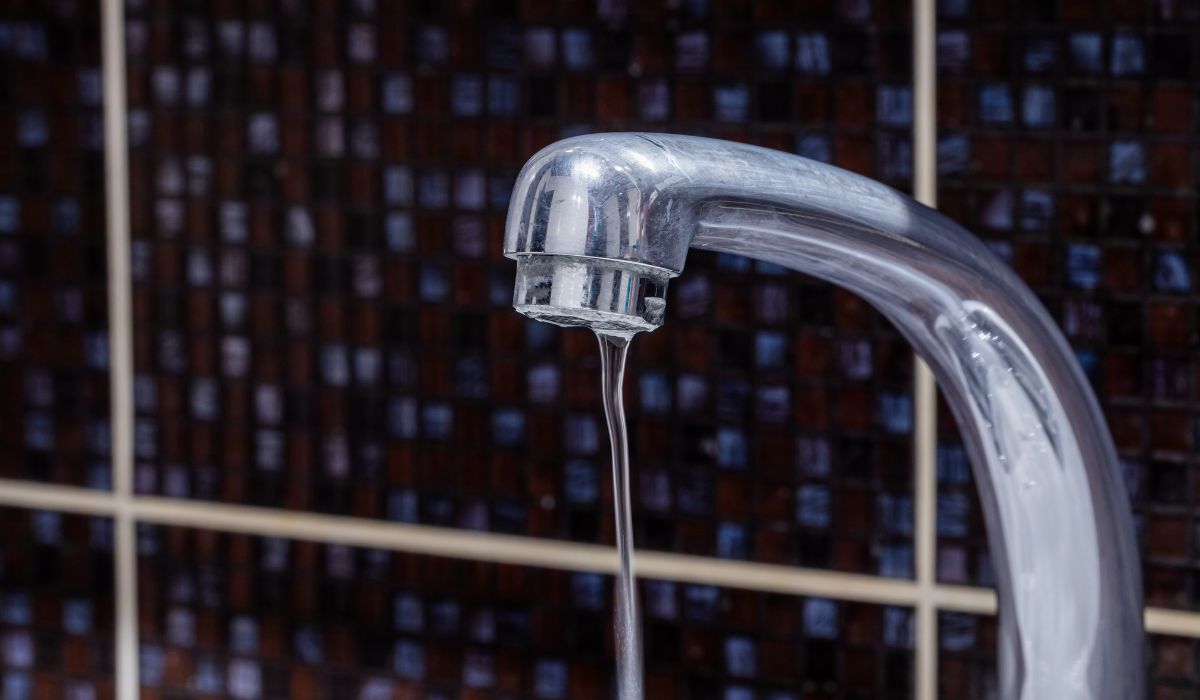
Are you grappling with the frustration of low or inadequate water pressure while trying to use your sink? Simple tasks such as washing dishes or refreshing a shower can become challenging in the face of low water pressure. The good news is that many solutions are available to help you boost water pressure within your home. Understanding low water pressure and how to fix itThe water pressure of any plumbing system is vital since it determines how fast the water flows through the pipes. It can be hard to perform daily tasks like showering, cleaning dishes, and flushing the toilet without adequate water pressure. You know how frustrating low water pressure can be if you have ever experienced it in your home. Common causes of low water pressureMany factors can cause low water pressure, including:
Identifying the source of the problem is the first step to increasing water pressure. Contact your local water company for help if you suspect the problem is related to your city's municipal water system or supply. You can try to increase your home's water pressure if you suspect it is a problem with your municipal water supply. How to identify the cause of low water pressureTo fix any problem, the first thing you need to do is identify the cause. There are many possible causes for low water pressure. There could be a blockage in the pipes, a problem with your water heater, or an issue with your water pressure regulator. Start by checking the pipes. Check for blockages such as debris or rust. Look for signs of corrosion or leakage. You can use a snake to clear a blockage in your pipes or repair any damage. The water heater will most likely be the culprit if the pipes are in good shape. Verify that the pressure gauge for household water supply is within normal limits. The water heater might need to be repaired or replaced if it is not working properly. Check the regulator of water pressure. It could be set too low and cause low water pressure. You can either adjust the pressure-reducing valve regulator yourself or hire a professional. Materials and Tools RequiredAfter identifying the cause of low water pressure, get the tools and materials needed to repair it. If you have a clog, you'll need a plumber's snake, pipe repair clamps, and a plumber's tap. You may need to replace your water heater and your water pressure gauge if it is damaged beyond repair. You will also need various plumbing instruments, including a screwdriver, pipe cutter, and wrench. You'll need a valve wrench and a pressure gauge to adjust the water regulator. Are you ready to fix low water pressure quickly? A Step-by-Step GuideIt's now time to get started on the repairs. This is a step-by-step guide to help you do the repair yourself. Step 1: Turn off the water supply. Shutting off your water supply before you start any plumbing repair is essential. This will stop any water leaking from the pipes, causing damage. Step 2: Repair the cause of low water pressure. Use a plumbing serpent to clear the obstruction in the pipes and repair any damage. Replace the pressure gauge or even the water heater if it is a water heater problem. If the water pressure regulator is malfunctioning, you can adjust it to the most desired pressure setting. Step 3: Check the water pressure. After you have made the necessary repairs, test the water pressure. You may need to contact a plumber if the pressure remains low. Increasing Water Pressure in Your HomeOnce you have identified the reason for low water pressure, you can look into possible solutions. We'll look at some of the most common causes. You can try these steps to increase the water pressure at your home. Look for Water Leaks along the Water Supply LineWater pressure can be affected by a leak in the water line itself. Check visible pipes for signs of water damage or moisture. You can also use a water meter for an increase in water consumption. Check and Clean your PipesPipes can become clogged with corrosion or mineral buildup, reducing water pressure and limiting the flow of water. Hire a plumber or use a pipe-cleaning solution to clean your pipes. Replace Restrictive or Aerators ValvesAerators or valves that restrict water or flow rate can reduce water pressure. Replace these components with less restrictive, newer models to increase water pressure. Update your Plumbing FixturesLow water pressure can also be caused by poor water pressure or by old or outdated plumbing fixtures. Upgrade to high-efficiency fixtures that are more modern and efficient can increase your water pressure. Install a Water Pressure BoosterIn the event that all other options fail, you can install a water pressure booster to your pressure tank to increase the pressure of water entering your home. Replace Corroded PipesYou may have to replace your pipes if they are corroded. Corrosion may cause low water pressure and, in some cases, cause leakage of water from the pipes. Consult a plumber if you are unsure of how to replace your pipes. Note that a normal water pressure or booster may not be the best solution for low water pressure. It could cause side effects, such as increased pressure in the pipes, which can lead them to burst. It is, therefore, important to get a plumber to assess your installation in order to determine whether it is the best solution. Tips for Maintaining Good Water Pressure
Low water pressure is a frustrating issue, but the cause of it can often be addressed easily. You can improve your plumbing by identifying the source of the problem and then following the steps in this article. When dealing with complicated plumbing problems, it is best to consult a professional. They can offer a more accurate diagnosis and safer repair. Act Now to Restore Your Water Pressure!In plumbing, tackling low water pressure can be a source of frustration, but it's often the result of common and manageable issues. By identifying the root cause and following the steps outlined in this article, you can significantly enhance water pressure in your home, making daily tasks like showering and dishwashing a breeze once again. Remember, for more complex plumbing concerns, it's always wise to consult a professional plumber who can diagnose accurately and execute safe repairs. Ready to address your low water pressure concerns and ensure your plumbing is in top shape? Don't hesitate to contact our experienced team at New West Plumbing in New Westminster. We offer expert plumbing services to help you resolve any issues and maintain the water pressure you deserve. Call us today at 04-256-5590 for a free consultation and quote. 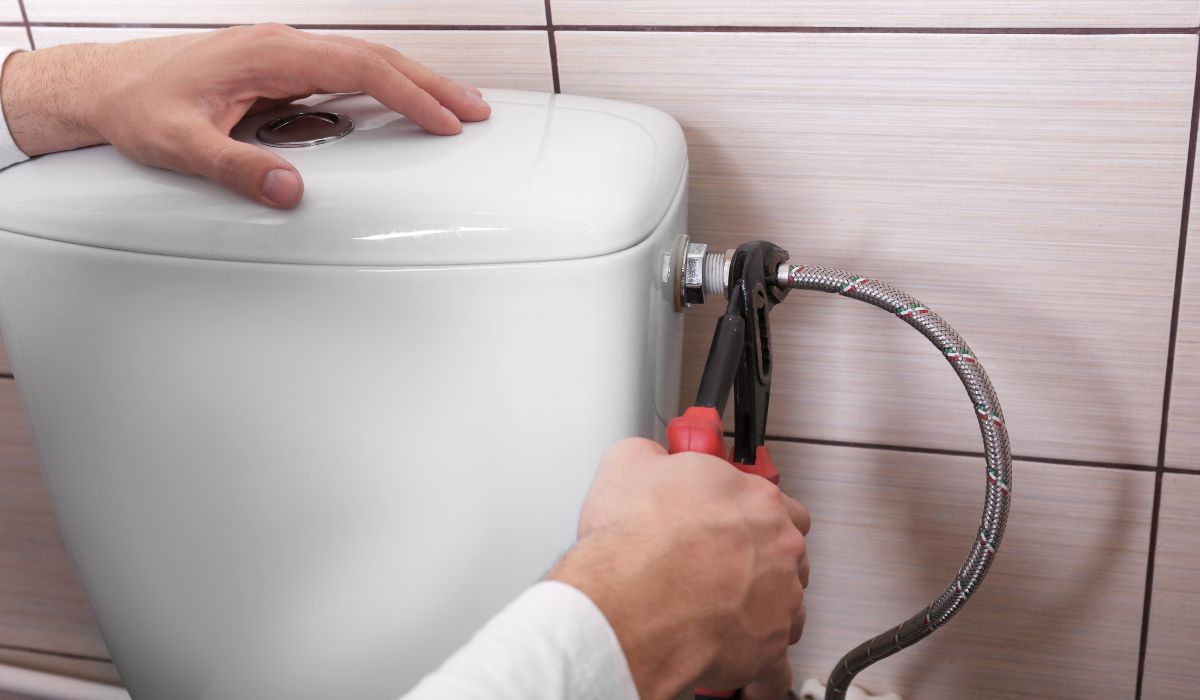
Ahh, the humble toilet. Often taken for granted, it is an essential fixture in our lives. Our toilets witness everything from the early morning rush to get ready for work to the peaceful moments of solitude. Yet, we rarely pause to appreciate their significance until something goes awry. The importance of having a fully functional toilet cannot be overstated. It is not merely an item of convenience but a necessity that ensures proper sanitation and hygiene. A malfunctioning or unreliable toilet can disrupt our daily routines and cause significant inconvenience. When faced with issues such as constant leaks, clogs, or cracks in the porcelain bowl or tank, we are often confronted with a dilemma: should we repair the existing toilet or replace it altogether? This article will guide you in deciding between these options - Toilet Replacement or Repair? Assessing the Current Toilet ConditionSigns indicating the need for repair or replacementWhen it comes to assessing your toilet's condition, several signs can indicate whether repair or replacement is necessary. One common issue is constant leaks and water wastage. If you notice water puddles around the base of your toilet or a constantly running toilet, it could be a sign of a faulty valve or seal that needs repair. Another indicator is frequent clogs and backups. If you experience clogs even after using a plunger or notice standing water in your toilet bowl that drains longer than usual, it might be time to consider a replacement. Cracks, chips, or damage to the porcelain bowl or tank are also red flags, as they can lead to further water damage and weaken the overall structure of the toilet. An outdated design and inefficiency can be factors in favor of replacing your old toilet with a more modern and eco-friendly option. Constant leaks and water wastageConstant leaks from your older toilets waste precious water and increase utility costs over time. The most common type of leak occurs when there is an issue with the flapper valve in the bottom of the toilet tank that controls water flow during each flush. A worn-out flapper valve may not create a proper seal, causing water to continuously leak into the bowl from the tank. Additionally, problems with fill valves can lead to random stoppages in flushing and inefficient use of three to five gallons per flush (depending on age). These issues can be fixed through repair by replacing faulty components. Frequent clogs and backupsExperience clogs and backups regularly indicate that something is amiss with your current toilet system. Due to weak flush mechanisms or clogged drain lines, older toilets may not have sufficient flushing power. Find yourself frequently reaching for a plunger or using chemical drain cleaners. It may be time to consider replacing your toilet rather than repeatedly dealing with these inconveniences. Newer toilets are designed with improved flushing technology that ensures efficient waste removal, reducing the likelihood of clogs and backups. Cracks, chips, or damage to the porcelain bowl or tankThe presence of cracks, chips, or other damages in your toilet's porcelain bowl or tank is not only unsightly but can also lead to water leakage and potential water damage to your bathroom floor. Over time, these damages can worsen and compromise the structural integrity of the toilet as well. Repairing such damages might be possible in some cases; however, if the cracks are substantial or if the integrity of the toilet is compromised, a replacement would be more appropriate to ensure both functionality and aesthetics. Outdated design and inefficiencyIf your current toilet is outdated, it may lack advanced features that promote efficiency and convenience. Older toilets often use more water per flush than newer models, which have evolved with water-saving features like dual flush systems. By opting for a new toilet replacement that meets modern standards for water conservation (1.6 gallons per flush), you can contribute towards environmental sustainability while potentially saving on future utility costs. Furthermore, contemporary designs offer customizable options such as soft-close lids or even bidet attachments for added comfort and hygiene. Pros and Cons of Toilet RepairCost-effective solution for minor issuesWhen facing minor issues with your toilet, opting for repair can be a cost-effective solution. Leaks, clogs, and running toilets are common problems that can often be fixed without a complete replacement. By addressing these issues promptly, you can avoid potential damage to the floor underneath the toilet or other bathroom areas. Additionally, repairing minor problems can save you from higher utility costs caused by water wastage. Fixing common problems like leaks, clogs, and running toiletsOne of the primary advantages of toilet repair is its ability to address common problems such as leaks, clogs, and running toilets. These issues can be frustrating and inconvenient if left unaddressed. Repairing a leaky toilet prevents water wastage and mitigates potential damage to your bathroom floor caused by standing water. Fixing clogs ensures proper flushing and prevents random stoppages that disrupt daily routines. Moreover, tackling running toilets can reduce excessive water usage, which translates into savings on utility bills. Replacing faulty components (flapper valve, fill valve, etc.)Toilet repair often involves replacing faulty components such as the flapper valve or fill valve. These parts are crucial for ensuring the proper functionality of the toilet's tank mechanisms. A flapper valve that doesn't seal properly may cause constant clogging or leaking, while a malfunctioning fill valve may lead to an inconsistent flush or inadequate refilling of the tank after each use. By replacing these components when necessary, you can restore optimal performance without needing to replace the entire toilet. Limitations of repair optionsWhile repairing your toilet is beneficial in many cases, it does have its limitations. Even after multiple repairs, age-related wear and tear may lead to recurring issues. Over time, toilets can develop structural problems that go beyond what simple repairs can fix. Visual scratches, cracks, or damage to the porcelain may compromise the toilet's integrity and increase the risk of leaks or further breakdowns. Furthermore, if you have an older model toilet, finding replacement parts can become challenging as they may no longer be readily available. When faced with these limitations, it might be worth considering a new toilet installation as a more viable long-term solution to avoid continuous repair costs. Pros and Cons of Toilet ReplacementAdvantages of installing a new toiletWhen considering whether to repair or replace your toilet, it is essential to weigh the advantages of installing a new one. One significant advantage is the improved water efficiency offered by modern low-flow models. These toilets are designed with water-saving features like dual flush systems, allowing you to choose between a full flush for solid waste and a reduced flush for liquid waste. This not only helps conserve water but also reduces your monthly water bill. Additionally, the environmental benefits of using a low-flow toilet should not be overlooked. By reducing water usage, you contribute to sustainable living practices and demonstrate your commitment to preserving our planet's resources. Moreover, over time, the potential cost savings from decreased water consumption can significantly increase. Another advantage of replacing your toilet is the opportunity to enhance aesthetics with various design options available today. Different shapes, such as round or elongated bowls, allow you to choose what best suits your comfort and space requirements. Moreover, you can select from standard or comfort height models based on personal preference and accessibility needs. Alongside these considerations, color choices are extensive, enabling you to seamlessly match or complement your bathroom decor. Furthermore, customizable features like soft-close lids provide added convenience by preventing loud slams and reducing wear and tear on the toilet seat over time. For even more luxurious options, bidet attachments can be easily installed with certain toilet models. Disadvantages of replacing a toiletWhile there are numerous advantages to replacing a toilet, it is also important to consider the associated disadvantages before deciding. One significant consideration is the cost implications involved in purchasing a new toilet, along with any additional installation fees that may arise if professional assistance is required. The price range for toilets varies depending on brand reputation, design features, and material quality. However, it is crucial to remember that investing in a high-quality toilet can offer long-term durability and performance, making it worthwhile. Another disadvantage to replacing a toilet is the potential need for plumbing modifications. If your new toilet requires different plumbing connections than your existing one, additional expenses may be incurred to ensure proper installation. Such modifications might involve adjusting the water supply line or waste pipe location, which could require professional assistance if you lack experience in plumbing work. Considering both the advantages and disadvantages of replacing a toilet is paramount when deciding between repair or replacement. While improved water efficiency and enhanced aesthetics are compelling reasons to opt for a new toilet, cost considerations and potential plumbing modifications should also be taken into account. Therefore, carefully assessing your needs and budget will allow you to make an informed choice that best suits your requirements regarding efficiency, design aesthetic, and long-term satisfaction with your bathroom fixture. Choosing Between Repair or ReplacementFactors to consider when deciding:Extent of the problem: Assessing the severity of the issue is crucial in making an informed decision. If you are experiencing minor issues such as a leaking flapper valve or a clogged toilet that can be easily resolved with a repair, it may be more cost-effective to opt for repairs. However, suppose you have been experiencing frequent clogs, random stoppages, or visual scratches indicating significant wear and tear. In that case, it might be a good sign that your toilet has reached the end of its lifespan, and replacing it could be the better option. Age and condition: Considering the age of your toilet is important when deciding between repair or replacement. If you have an older model that frequently experiences leaks and other issues despite multiple repairs, it might indicate that the overall condition of your toilet has deteriorated significantly. In such cases, investing in a newer model can provide long-term peace of mind and potentially save on utility costs due to improved water efficiency. Cost implications: Financial considerations play a role when deciding between repair or replacement. While minor repairs are generally more affordable upfront than purchasing a new toilet, constantly fixing quite a few items can add time and money. Additionally, you regularly spend money on replacement parts for an older model with limited availability. Replacing your entire toilet with a newer model in the long run may be more cost-effective. FAQsWhen is it time to replace an older toilet?If your older toilet frequently requires repairs and isn't water-efficient, it's time to consider a replacement. Newer models offer better efficiency and functionality. My toilet has stopped flushing. Is it time to replace it?Not necessarily. A non-flushing toilet may have a fixable issue. Start with a repair; if problems persist, consider a replacement. Are low-flush toilets a good replacement choice?Low-flush toilets are excellent replacements, as they conserve water and reduce utility costs, contributing to a greener environment. What's the difference between water-efficient toilets and average toilets?Water-efficient toilets use less water per flush, saving money and conserving resources. Average toilets consume more water and may be less cost-effective in the long run. Is frequent toilet paper clogging a sign to replace my toilet?Frequent clogs can often be resolved with repairs or adjustments. Replacement should be considered if clogs persist despite proper maintenance. Should I choose a toilet with a dual flush feature when replacing it?Dual flush toilets offer water-saving options, making them a great choice. You can use a lower flush for liquid waste and a higher flush for solid waste, conserving water effectively. Toilet Repair or Replacement? Contact New West Plumbing TodayChoosing between repairing or replacing your toilet requires careful analysis of various factors. While repairs can offer temporary solutions for minor issues at lower costs initially, if you experience persistent problems related to age-related wear and tear or outdated design limitations, consider replacing your toilet. Investing in a newer model can improve the functionality and efficiency of your plumbing system and enhance your bathroom's aesthetics. Ultimately, making the right choice will ensure a reliable and hassle-free toilet experience. When deciding on toilet repair or replacement, make the right choice for a reliable plumbing system. Contact New West Plumbing in New Westminster, BC, for a free estimate today! 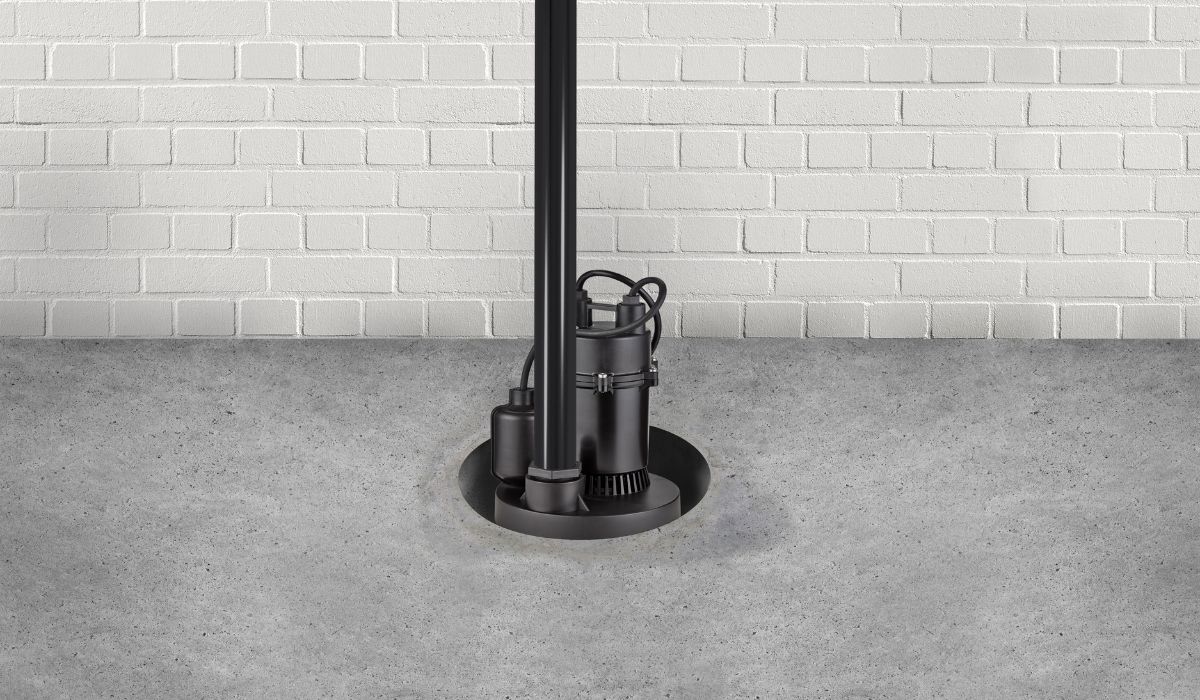
Flood Prevention: How to Troubleshoot Your Sump PumpFlood prevention is crucial to maintaining a safe and habitable living environment. When heavy rainfall or melting snow overwhelms the natural drainage systems, water can seep into basements and cause extensive damage. This is where sump pumps come into play. A sump pump is a vital device designed to remove excess water from basements or crawlspaces, preventing flood-related disasters. Regular maintenance and troubleshooting are imperative to ensure the sump pump's efficiency. Understanding how to troubleshoot common issues with your sump pump can save you from potential headaches and costly repairs in the long run. In this article, we will guide you through the process of troubleshooting your sump pump effectively. We'll help you recognize signs indicating possible problems with your sump pump's performance and equip you with step-by-step instructions on testing it regularly for optimal functionality. Understanding the Basics of Sump PumpsDefinition and Purpose of a Sump PumpWhen it comes to flood prevention, a sump pump stands as a stalwart defender of your home. A sump pump, known as the sump pit, is an essential device designed to remove water accumulating in the lowest part of your basement or crawl space. Its primary purpose is to prevent flooding by efficiently removing excess water and redirecting it away from your property. Sump pumps offer homeowners peace of mind during heavy rainfall or rising groundwater levels, acting as a reliable last line of defense. Components and Working Mechanism of a Typical Sump Pump SystemA typical sump pump system consists of several fundamental components working in unison to ensure effective flood prevention. The primary components include the pump, a float switch or electronic sensor, discharge pipes, and check valves. The heart of the system is the submersible pump or pedestal pump. This motor-driven device sits within the sump pit and activates when water levels reach a predetermined height, typically detected by the float switch or sensor. When triggered, the motor engages and starts removing water from the pit through an intake valve at its base. The water passes through an impeller within the pump housing, which forcefully propels it towards an upward-facing discharge pipe connected to one end of the pump housing. A check valve prevents backflow into the pit once water reaches its maximum height in the discharge pipe. The discharge pipe extends vertically above ground level before bending horizontally away from your home's foundation into a suitable drainage area such as a municipal storm sewer or dry well. This ensures proper channeling away from your property without allowing water to pool near the foundation. It is crucial to install the discharge pipe correctly, considering its slope and distance from the house, to prevent any potential issues with drainage. Understanding these fundamental components and the working mechanism of a typical sump pump system lays a solid foundation for troubleshooting and maintaining your flood prevention apparatus. Signs of Sump Pump IssuesUnusual Noises or VibrationsOne of the first signs that something may be amiss with your sump pump is the emergence of peculiar noises or vibrations. These abnormal sounds can range from grinding or rattling to gurgling or squealing, indicating potential problems within the system. There are several possible causes behind these unsettling sounds, including a damaged impeller, malfunctioning check valve, or debris clogging the pump. To troubleshoot this issue, start by checking for any obstructions in the discharge pipes and remove them if present. Next, inspect the impeller for damage and replace it if necessary. If neither of these actions resolves the problem, it may be a malfunctioning check valve that needs to be replaced. Remember to always disconnect power before attempting any repairs and consult a professional if you're unsure about handling these tasks yourself. Frequent Cycling or Failure to Turn On/OffAnother sign that your sump pump may be experiencing issues is when it frequently cycles on and off or fails to activate altogether. This can occur due to various reasons, such as a stuck float switch, a faulty check valve, or even an inadequately sized pump for your specific needs. To troubleshoot this problem, start by checking if anything is obstructing the float switch's movement within the sump pit—clear away any debris that may be causing interference. Additionally, inspect the check valve for proper function; a malfunctioning check valve could cause water to flow back into the pit and trigger frequent cycling. If these checks don't resolve the issue, consider consulting an expert who can assess whether your pump is appropriately sized for your home's drainage requirements. Taking appropriate action to troubleshoot these issues, whether it involves clearing debris, inspecting and replacing damaged parts, or seeking professional assistance, will help ensure the continued functionality of your sump pump and prevent potential flood damage in your home. Testing Your Sump Pump RegularlyImportance of Routine Testing for Proper Functionality: Ensuring Your Pump's ReliabilityRegular testing of your sump pump is crucial to ensure its optimal performance during times of heavy rain or potential flooding. By conducting routine tests, you can identify any underlying issues and address them promptly, preventing potential disasters in the future. Neglecting this essential maintenance task could leave you vulnerable to a malfunctioning pump when you need it the most. Step-by-Step Guide to Testing Your Sump Pump: A Foolproof MethodTo effectively test your sump pump, follow these simple steps:
Before beginning the test, inspect the power cord and connections for any signs of damage or wear. Ensure that they are properly plugged into a functioning electrical outlet. Avoid using extension cords as they may not provide enough power for the pump's operation.
Fill a bucket with water (approximately five gallons) and slowly pour it into your sump pit until it reaches a level where the float switch should activate.
As you pour water into the pit, listen for the sound of the motor running, indicating that your sump pump has been activated. Pay attention to how efficiently it removes excess water from the pit through its discharge line. Observe whether there are any unusual noises or vibrations during operation. By diligently following this step-by-step guide, you can gain valuable insights into your sump pump's functionality and identify any potential issues before they escalate into significant problems. Common Problems and Troubleshooting TechniquesClogged or Frozen Discharge PipeOne of the most common sump pump problems is a clogged or frozen discharge pipe. When the discharge pipe becomes obstructed, it prevents the water from being pumped out effectively, leading to potential flooding. To identify blockages in the discharge pipe, start by visually inspecting it for any visible clogs or debris. If you notice a clog, gently remove it using a plumbing snake or a garden hose with high-pressure water to dislodge the obstruction. In cases where freezing occurs during winter months, make sure to thaw the pipe before attempting any clearance techniques. Applying heat using a hairdryer or warm water can help melt ice buildup within the discharge pipe. Stuck Float Switch or Faulty Check ValveAnother prevalent issue with sump pumps is a malfunctioning float switch or check valve. The float switch is responsible for activating and deactivating the sump pump as needed, while the check valve prevents the backflow of water into the pit after pumping. If you suspect a stuck float switch, try manually moving it up and down to see if it triggers the pump's operation. Sometimes, the accumulation of debris may hinder its movement, and thorough cleaning should fix this problem. For faulty check valves causing backflow issues, consider replacing them with new ones that are compatible with your system specifications. Ensure that all replacement parts are installed correctly and securely to avoid further complications in your sump pump system. Critical Maintenance Tips for Optimal PerformanceRegular Cleaning of the Sump PitOne of the key maintenance tasks for ensuring your sump pump's optimal performance is regular cleaning of the sump pit. Over time, debris, such as dirt, leaves, and small rocks, can accumulate in the sump pit. These unwanted materials can hinder the proper functioning of your sump pump, potentially causing it to get stuck or clogged. By removing these obstructions from the sump pit, you allow for unimpeded water flow into the pump and prevent potential blockages in discharge pipes. Regular cleaning also ensures that sediment buildup does not interfere with the float switch's movement or obstruct other crucial components. Battery Backup Systems for Power Outages: How They Work and Why They Are EssentialIn situations where power outages occur during heavy storms or other unforeseen circumstances, having a battery backup system for your sump pump becomes essential. During a power outage, when normal electrical power is not available, relying solely on standard electric-powered sump pumps can leave your basement vulnerable to flooding. A battery backup system acts as an insurance policy by providing emergency power to keep your sump pump operational when electricity is cut off. This valuable addition ensures that even during blackouts or when main electrical breakers trip, your sump pump continues to remove excess water from the sump pit and protect your basement from flooding. Replacing Worn-Out PartsLike any mechanical equipment, over time, various parts of a sump pump may wear out or become damaged due to continuous use or external factors. Replacing worn-out parts is crucial to maintain optimal performance and avoid sudden breakdowns when you need your sump pump the most. Some key components that may require replacement include impellers, switches (such as float switches), and check valves. When replacing these parts, it is important to consult the manufacturer's instructions or seek professional guidance. FAQs: Flood Prevention - How to Troubleshoot Your Sump PumpWhat should I do if my sump pump stops working?If your sump pump stops working, begin by checking the sump pit and discharge line for clogs. Inspect the power source, including the home's main electrical panel and any tripped breakers. Ensure the sump pump's float switch is functioning correctly and there are no issues with the sump basin or sump pit filling up too fast. Incorrect installation can also be a common cause of sump pump failure. How do I troubleshoot a sump pump that frequently runs or cycles on and off?If your sump pump frequently runs or cycles, it may indicate problems like a sump pit filling up too fast, a malfunctioning float switch, or a leaky discharge line. Additionally, air pressure in the discharge pipe can lead to frequent cycling. To troubleshoot, check for these issues, and make necessary repairs or adjustments. What can I do to prevent sump pump failure and ensure my sump pump works properly?Preventing sump pump failure involves regular maintenance, including cleaning the intake screen and checking for clogs in the sump pit and discharge line. Ensure proper installation with functioning check valves and address any issues promptly. DIY troubleshooting and investing in a sump pump repair service can help keep your sump pump working optimally and prevent potential flood-related problems. Protect Your Home: Contact Our New Westminster Experts for Sump Pump Services!Troubleshooting your sump pump requires diligence and knowledge of its components and functions. By understanding the basics of sump pumps and recognizing signs of potential issues like unusual noises or frequent cycling, you can proactively address problems before they escalate into major failures. Regular maintenance practices like testing the pump's performance and clearing clogs from the discharge pipe are crucial preventive measures. Investing in additional tools like multimeters and infrared thermometers can aid in diagnosing complex problems efficiently. Remember that ensuring your sump pump is installed correctly with functioning check valves is vital for optimal operation. With these troubleshooting techniques, maintaining a dry basement or crawl space becomes more achievable than ever. So take charge of flood prevention today by implementing these strategies and safeguarding your home against water damage! Is your sump pump not working properly, or do you need expert assistance with your plumbing system? Contact New West Plumbing in New Westminster, BC, for professional sump pump services and plumbing solutions. Don't wait for your sump pump to stop working – let us ensure it's in top condition and ready to protect your home from potential water damage. 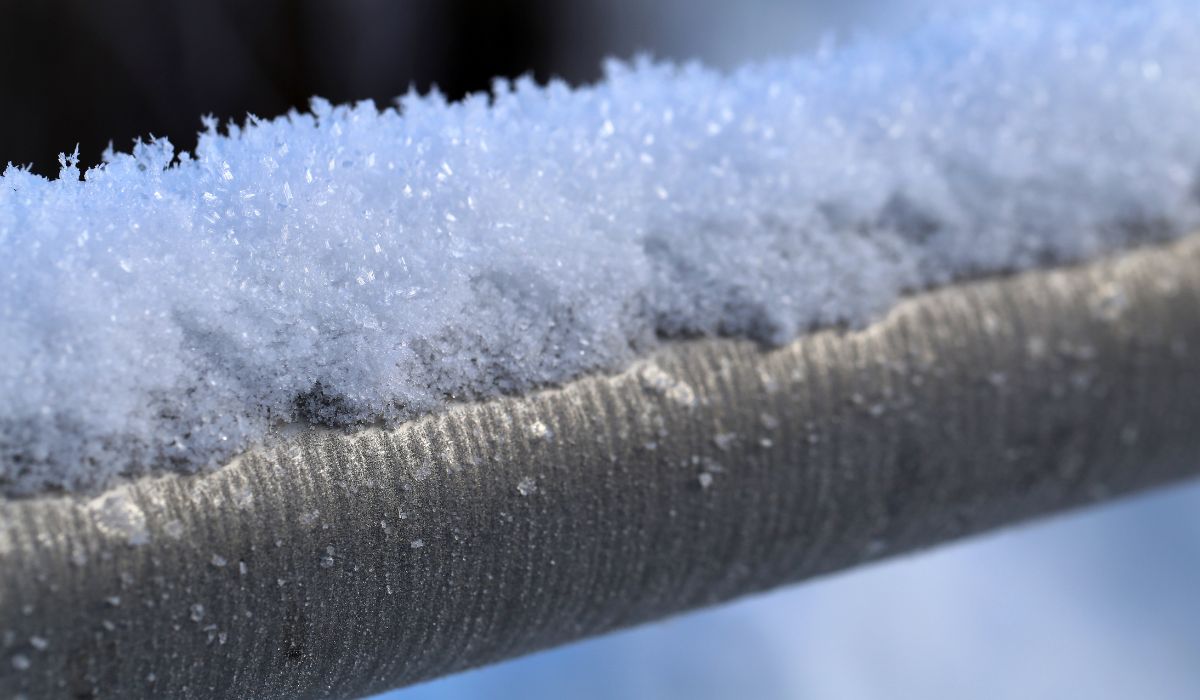
As winter casts its icy grip upon us, it becomes increasingly important to equip ourselves with knowledge and preparedness to tackle the potential hazards of plummeting temperatures. One such peril that can wreak havoc on our homes and cause a multitude of inconveniences is a frozen pipe. Understanding what to do if your pipes freeze is crucial for preserving the integrity of your plumbing system and safeguarding your property from costly damages. This comprehensive guide delves into the causes and telltale signs of frozen pipes, the immediate actions to take when you discover the freeze, and how to safely thaw the pipes. We'll also explore how to inspect and address any potential damage post-thaw and, most importantly, the preventive measures to keep your pipes from freezing in the future. So, as winter's icy embrace tightens, equip yourself with the knowledge and strategies you need to protect your plumbing and your home. Understanding the Causes and Signs of Frozen PipesExplanation of why pipes freeze in cold weather conditionsWater inside pipes can freeze when the temperature drops significantly, especially during winter months. The freezing process occurs due to a combination of factors. Firstly, when water reaches its freezing point of 32 degrees Fahrenheit (0 degrees Celsius), it begins to solidify into ice. Secondly, pipes exposed to extremely cold temperatures or insufficiently insulated are more prone to freezing. This is because the cold air decreases the surrounding temperature of the pipe, causing the water inside to lose heat rapidly. Stagnant or slow-moving water is more likely to freeze than constantly flowing water since flowing water has less time available for cooling and is less likely to reach freezing temperatures. Identifying Signs that Indicate Your Pipes May Be FrozenIt's crucial to recognize early indications of frozen pipes to take prompt action and prevent potential damage. Several signs can help identify if your pipes have frozen: - No running water or only a trickle coming from faucets. When water freezes in a pipe, it blocks the flow, leading to reduced or no delivery. Unusual noises: If you hear strange noises like clanking or banging when turning on taps, there's a possibility that trapped air pockets caused by ice blockages are creating pressure within the pipe. - Frost on exposed pipes: Visible frost indicates that they have reached freezing temperatures. Strange odors: A distinct smell similar to rotten eggs could indicate a burst pipe. The odor is caused by sewage backup due to frozen or damaged plumbing. Bulging or warped pipe sections: Frozen water expands and exerts pressure on the pipe walls, potentially causing visible deformations. By understanding why pipes freeze and recognizing these telltale signs early on, you can take appropriate action to prevent further damage and ensure the swift thawing of your pipes. Immediate Actions to Take When You Discover Frozen PipesShutting off the main water supply to prevent further damageWhen you discover frozen pipes in your home, the first step you should take is shutting off the main water supply. This is crucial to prevent potential disasters like burst pipes. Locate the main water valve, usually situated near the water meter or where the pipe enters your home. Turn it clockwise to shut off the water supply completely. Doing so removes any additional water flow into your plumbing system, minimizing damage and pressure on frozen pipes. Opening faucets to relieve pressure and allow water to flow once thawedAfter shutting off the main water supply, it's essential to open faucets connected to both hot and cold lines throughout your house. Opening multiple faucets relieves any remaining pressure in the system and creates an avenue for thawed water flow once pipes are unfrozen. Open both hot and cold taps slightly; this helps in releasing built-up pressure inside the plumbing system. Remember that not all pipe sections may be frozen; opening multiple faucets ensures that non-frozen portions can still dispense some residual water. Thawing Techniques for Frozen PipesSafely using Heat Sources like Hairdryers, Heat Lamps, or Towels soaked in hot waterWhen faced with frozen pipes, it is crucial to initiate the thawing process promptly to minimize the risk of pipe damage. One effective method is utilizing heat sources such as hairdryers, heat lamps, or towels soaked in hot water. Hairdryers can be particularly useful due to their directed airflow and controllability. To begin, set the hairdryer to its lowest heat setting and aim it at the frozen section of the pipe. Gently move the dryer back and forth while maintaining a safe distance from the pipe to avoid overheating or damage. Alternatively, you can attach a heat lamp near the affected area while ensuring it does not come into direct contact with any flammable material. Detailed instructions on how to apply heat without causing damage or fire hazardsWhile thawing your pipes using heating methods is essential, exercising caution and following safety guidelines to prevent damage or fire hazards is equally vital. First, never use an open flame device like a torch or charcoal stove to thaw frozen pipes, as this poses an immediate fire risk. Instead, stick to safer alternatives such as hairdryers or heating pads designed specifically for thawing. Additionally, avoid using portable space heaters near any potential water leaks or areas prone to moisture accumulation, as this could cause electrical hazards. Moreover, never leave any heating source unattended during the thawing process. Emphasizing the Importance of patience during the thawing processPatience is key when dealing with frozen pipes and initiating their thawing process. It may be tempting to rush through this task in hopes of quickly restoring water flow; however, applying excessive heat too rapidly can result in cracked pipes due to sudden temperature changes. Therefore, it is crucial to allow the thawing process to occur gradually. Be diligent and attentive while applying heat to the frozen section, periodically checking for signs of progress. Remember, pipe freezing is inconvenient, but taking the time to thaw them correctly will prevent further damage and costly repairs in the long run. By carefully utilizing heat sources like hairdryers or heat lamps, following safety guidelines to avoid damage or fire hazards, and practicing patience throughout the thawing process, you can effectively restore water flow in your frozen pipes without causing any further issues. Inspecting and Assessing Potential Damage After ThawingUnveiling the Hidden Consequences: A Post-Thaw RevelationAfter successfully thawing out your frozen pipes, it is crucial to meticulously inspect and assess any potential damage that may have occurred during the freeze. Even though water flowing freely from taps is a promising sign, it does not guarantee that your pipes have emerged unscathed. Temperature fluctuations induced by freezing and subsequent thawing can weaken pipe integrity, making them susceptible to leaks or cracks. Therefore, carefully examining your water supply pipes is of utmost Importance. Identifying Leaks and CracksBegin by visually inspecting all accessible sections of the pipes once they have completely thawed out. Look for obvious signs such as water droplets, puddles, or dampness around the pipes. Pay particular attention to joints, connections, and areas exposed to colder temperatures, like exterior walls or unheated spaces. Run your fingers along the pipes to detect any subtle leaks or hairline fractures that may not be readily visible. Remember that even a minor leak can become a major problem if left unaddressed. Tackling Damages Head-On: From Detection to ResolutionIf you discover any damages during your inspection, prompt action is imperative to prevent further deterioration and potential flooding in your home. You can use specialized pipe repair tapes or epoxy compounds designed for temporary fixes for small leaks or minor cracks. These solutions provide a quick patch until professional assistance can be sought for permanent repairs. However, suppose you encounter major ruptures or extensive damage in multiple areas of your plumbing system. In that case, it is advisable to shut off the main water supply immediately and contact a licensed plumber without delay. Attempting complex repairs on your own may lead to exacerbating the issue or causing additional damage. Remember, inspecting and addressing damages promptly will help safeguard your home from the detrimental effects of water damage and preserve the integrity of your plumbing system. Preventive Measures for Avoiding Future Pipe FreezingInsulating Vulnerable Pipes in Unheated AreasIt is crucial to insulate those in unheated areas such as attics, basements, or crawl spaces To prevent pipes from freezing. Insulation acts as a barrier, protecting the pipes from external cold temperatures. Several insulation materials are available, including foam pipe sleeves, heat tape, and fiberglass insulation. Foam pipe sleeves are easily installed by wrapping them around the pipes and securing them with adhesive or zip ties. Heat tape is an excellent option for particularly vulnerable pipes, providing constant low-level heat to prevent freezing. Fiberglass insulation can be used in attics or crawl spaces to create a more comprehensive thermal barrier around the pipes. By insulating vulnerable areas effectively, you significantly decrease the risk of frozen pipes. Discussing Various Insulation Materials and Techniques AvailableWhen considering insulation materials for preventing pipe freezing, choosing ones suitable for your specific needs is important. Foam pipe sleeves are commonly used due to their affordability and ease of installation. They come in various sizes and can be cut to fit different pipe diameters accurately. Heat tape is another effective option that can be customized based on your requirements; it can be wrapped around exposed pipe sections or installed along its entire length when necessary. Additionally, fiberglass insulation is an excellent choice when insulating attics or crawl spaces since it provides better overall thermal protection against extreme cold temperatures. Tips on Sealing Gaps and Cracks That Allow Cold Air InfiltrationIn addition to insulation measures, sealing gaps and cracks that allow cold air infiltration are vital in preventing frozen pipes. Start by thoroughly inspecting your home's exterior walls and foundation for any visible openings where cold air might seep through. Use caulking or weatherstripping to seal gaps around windows and doors. Pay close attention to areas where pipes enter your home, such as utility entry points. Apply expanding foam insulation to seal any noticeable gaps around these pipe entry points. For larger cracks or openings, consider using mortar or cement-based sealants. By diligently sealing these gaps and cracks, you can significantly reduce the risk of cold air reaching your pipes and causing them to freeze. By implementing these preventive measures, such as insulation and sealing gaps and cracks, you can greatly minimize the chances of experiencing frozen pipes in the future. Remember that taking proactive steps to protect your pipes during colder seasons saves you from potential headaches, costly repairs, and water damage caused by burst pipes due to freezing temperatures. FAQsWhat causes pipes to freeze, and how can I prevent frozen pipes in my home, especially exposed pipes, in cold weather?Pipes freeze due to extreme cold temperatures, lack of insulation, or direct exposure to frigid air. To prevent frozen pipes, consider insulating exposed pipes in unheated spaces like basements and crawl spaces. Use heat tape or foam pipe sleeves to seal gaps and cracks, allowing cold air infiltration. What should I do if my water pipes freeze?If your water pipes freeze, start by shutting off the main water supply to prevent pipe bursts. Then, open faucets to relieve pressure and help with the thawing process. Safely thaw frozen pipes using methods like hairdryers or heat lamps. Be patient and avoid using open flames or space heaters to unfreeze pipes. What are the signs of frozen pipes, and how do I know if my pipes are frozen?Signs of frozen pipes include reduced water flow, strange noises, visible frost on pipes, strange odors, and bulging or warped pipe sections. If you encounter any of these signs, it's essential to take action promptly to prevent further damage. How can I inspect and address potential damage after thawing frozen pipes?After successfully thawing frozen pipes, inspect them for leaks, cracks, or deformations. Address minor issues with pipe repair tapes or epoxy. However, for major problems or extensive damage, it's advisable to shut off the main water supply and contact a licensed plumber promptly. Can I use a space heater to unfreeze pipes safely?Using a space heater to unfreeze pipes is not recommended, as it can cause electrical hazards and damage. Using methods like hairdryers, heat lamps, or towels soaked in hot water for thawing frozen pipes is safer. How can I prevent my swimming pool supply lines from freezing in cold weather?To prevent swimming pool supply lines from freezing in cold weather, insulate them with suitable materials, like foam pipe sleeves or heat tape. Additionally, ensure proper drainage to avoid water accumulation in the lines during freezing conditions. Can I fix frozen pipes on my own, or should I seek professional help?While you can address minor issues using pipe repair tapes or epoxy, a licensed plumber should handle complex problems and major damage. Attempting complex repairs without expertise can worsen the issue. Secure Your Pipes: Contact New West Plumbing for Expert Solutions Today!Dealing with frozen pipes can be a frustrating and costly experience. However, by taking immediate action when you discover frozen pipes and implementing long-term solutions like installing electric pipe heating cables in cold climate regions, you can significantly reduce the risk of encountering this problem again. By being proactive and investing in preventive measures, you will gain peace of mind during harsh winters, knowing your pipes are protected from freezing. Remember, it is always better to prevent frozen pipes than to deal with the consequences of burst pipes and the potential water damage they can cause. Stay prepared, take action, and enjoy worry-free winters with the help of New West Plumbing in New Westminster, BC. Contact us today for expert plumbing solutions to keep your pipes in top condition. 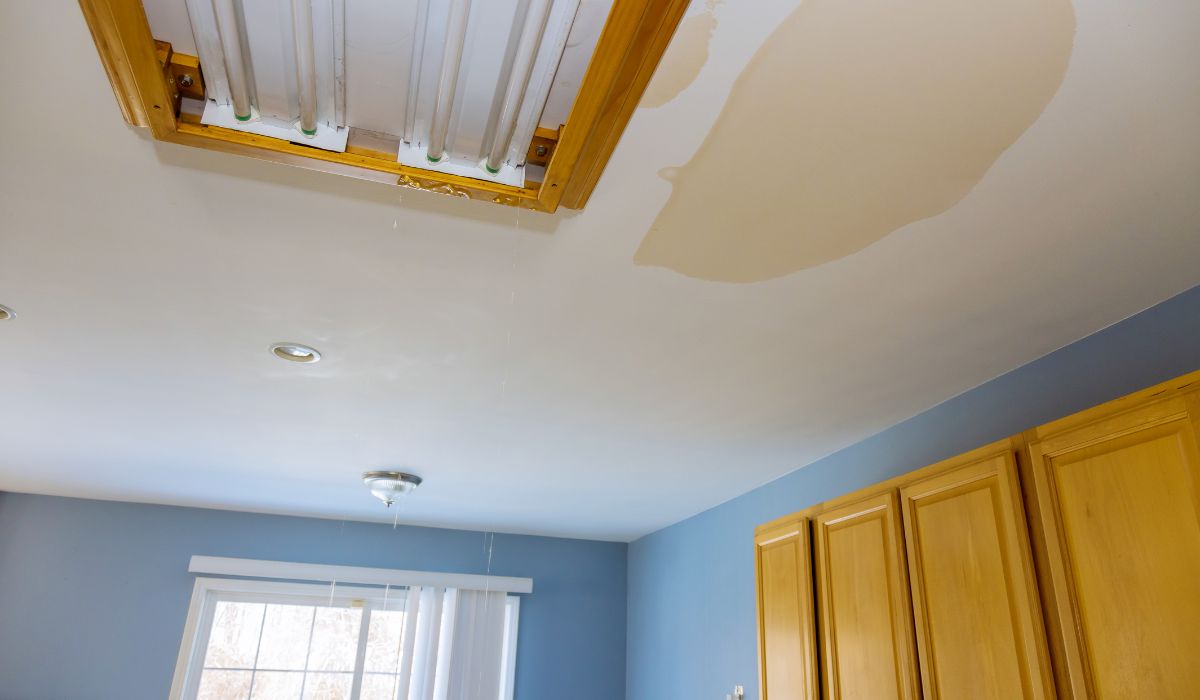
Unveiling concealed pipe leaks is crucial for several reasons. First of all, these undetected leaks often go undetected for prolonged periods due to their non-visibility. Unbeknownst to them, undetected hidden pipe leaks can quickly cause extensive and expensive damage over time as water seeps into walls, floors, or foundations, undermining its integrity and creating mold growth, rotting wood, or crumbling concrete that compromises it - all serious consequences that must be paid for with great expense and time to repair. Hidden pipe leaks play an enormous role in wasting our water resources. Every drop escapes through leaky pipes represents water lost unnecessarily - water that could have been used better or saved for areas impacted by droughts. This comprehensive guide is intended to arm you with the knowledge and tools to quickly identify hidden pipe leaks. We'll examine different kinds of hidden leaks such as pinhole leaks in copper pipes, slab leaks in concrete foundations, and any others lurking behind walls or under floors - as well as various detection methods, from simple visual inspections to advanced ones such as thermal imaging cameras or acoustic leak detectors. Understanding Hidden Pipe LeaksDefinition and Causes of Hidden Pipe LeaksHidden pipe leaks are elusive water leaks within the plumbing system but are not immediately visible or accessible. These leaks can happen in pipes made of various materials, such as PVC, copper pipe, or cross-linked polyethylene (PEX). The causes of hidden pipe leaks can be diverse. Environmental factors like soil movement, corrosion due to chemical reactions with water or household products, and even poor installation practices can all contribute to developing these leaks. High water pressure, temperature fluctuations, and age-related deterioration can also exacerbate the likelihood of hidden pipe leaks. Identifying the precise cause requires a comprehensive understanding of plumbing systems and the ability to employ various detection methods. Common Signs and Symptoms to Look Out ForDetecting hidden pipe leaks is crucial in preventing extensive damage to your property. Fortunately, there are several common signs and symptoms you should be vigilant about. One prominent indication is sudden increases in your water bill without a corresponding increase in usage. Additionally, discolored water from your taps could signal corrosion within the pipes or sediment buildup due to leakage. Keep an eye out for unexplained mold growth or musty odors in specific areas, as these can often be traced back to hidden pipe leaks behind walls or under floors. Another telltale sign is reduced water pressure throughout your home or areas experiencing consistently low pressure. Damp spots on walls or ceilings that do not have an apparent source could indicate a leaking pipe nearby. By understanding what hidden pipe leaks entail and being aware of their common signs and symptoms, you'll be better equipped to take swift action when necessary. Types of Hidden Pipe LeaksPinhole leaks in copper pipesPinhole leaks in copper pipes are tiny, often undetectable, resulting from various factors such as corrosion, high water pressure, or even poor water quality. Detecting these elusive small leaks can be challenging, but several methods are available. One effective approach is to closely inspect the affected area for signs of water stains or discoloration on walls or ceilings. Additionally, observing changes in water pressure or flow rate can indicate the presence of a pinhole leak. One option is to use self-fusing silicone tape to repair such leaks, which can be tightly wrapped around the damaged area to a watertight seal and stop the leak temporarily. However, it's important to consult the manufacturer's instructions and seek professional assistance for a more permanent fix. Slab leaks in concrete foundationsSlab leaks occur when there is a leakage within the piping system running beneath a concrete foundation. These hidden pipe leaks are typically caused by shifting soil, corrosion, or excessive pressure on pipes due to settling foundations. Detecting slab leaks requires specialized equipment and expertise. One common detection method involves observing unexplained warm spots on floors using thermal imaging cameras. Another technique employs acoustic leak detectors that pick up the sound of water and fix a leaking pipe under the slab surface. Once detected, repair options may include tunneling under the foundation to access and fix the damaged pipe or re-routing plumbing lines through alternative pathways. Leaks behind walls or under floorsLeaks occurring behind walls or under floors pose significant challenges in detection and repair due to their hidden nature. Advanced technology, such as thermal imaging cameras and sound amplification devices, becomes invaluable during this process. Thermal imaging technology detects temperature variations caused by water leakage behind walls or beneath flooring materials. Similarly, sound amplification devices enhance our ability to hear subtle dripping or running water sounds that indicate hidden leaks. Repairing these leaks involves accessing the affected area by removing portions of the pipe material, walls, or floors. A professional plumber is highly recommended to accurately locate and repair such leaks, ensuring minimal damage and further complications. Tools and Techniques for DetectionVisual inspection techniquesVisual inspection techniques are a crucial first step in identifying visible signs of hidden pipe leaks. These include checking for water stains, mold, or mildew on walls, ceilings, metal pipes, or floor surfaces. Discolorations or damp areas can indicate the presence of an underlying leak. Observing changes in water pressure or flow rate throughout the plumbing system can also provide valuable clues about potential leak locations. Advanced detection methodsAdvanced detection methods employ specialized tools to detect hidden pipe leaks more precisely. Thermal imaging cameras utilize infrared technology to visualize temperature variations caused by leaking pipes or water behind walls or under floors. By identifying hotspots associated with moisture, these cameras help pinpoint potential leak sources without invasive procedures. Acoustic leak detectors, on the other hand, amplify sounds produced by hidden leakage within pipes and can accurately locate the source of pesky leaky pipes, even when it cannot be seen visually. Professional assistanceWhile some DIY enthusiasts may be capable of detecting certain leaks and leaking pipe repair, calling on professional assistance is often beneficial when dealing with complex issues or hard-to-find leaks. Plumbers equipped with specialized leak detection equipment possess the expertise to swiftly identify hidden pipe leaks that may go unnoticed. Their experience allows them to employ various tools and techniques mentioned earlier efficiently, thus minimizing any further damage or complications during the repair process. DIY Leak Detection MethodsUsing food coloring to detect toilet tank leaksToilet tank leaks are common culprits behind high water bills. To check if your toilet tank is leaking, simply add a few drops of food coloring into the tank and wait for around 15 minutes without flushing. If the water in the bowl changes color, it indicates a leak between the tank and the bowl. This simple yet effective technique can help identify such leaks and prompt further repair or replacement actions. Conducting a meter test to check for underground leaksIf you suspect an underground leak, conducting a meter test can provide useful insights. Start by turning off all faucets and appliances using water. Locate your water meter and observe if it continues to register any usage. If the meter is showing consumption despite no recorded water usage in your home, it suggests an underground leak that requires attention from professionals. Steps to Take When a Leak is DetectedShutting off the main water supplyUpon detecting a hidden pipe leak, one of the first critical steps is to immediately shut off the main water supply valve to the pipe tape to prevent further damage and minimize the wastage of water. Assessing the extent of damageOnce you have shut off the main water supply, assessing the extent of damage caused by the leak becomes crucial. Carefully examine affected areas for any structural damage or signs of mold growth. Evaluating these factors helps determine whether professional assistance is required for repairs. Calling a professional plumber for repairsWhile some minor leaks may be fixed using DIY approaches, engaging professional plumbers with expertise in leak detection and pipe repair often ensures accurate diagnosis and effective solutions for hidden pipe leaks. They possess the necessary tools, experience, and skills to tackle complex repairs while minimizing disruptions to your plumbing system. Preventive MeasuresRegular inspection and maintenance routinesImplementing regular inspection and maintenance routines is essential to prevent hidden pipe leaks from occurring or worsening over time. Periodically inspecting visible pipes, joints, and valves can help identify early signs of corrosion or wear and tear, allowing for timely intervention to prevent leaks. Insulating pipes in cold weather areasIn regions experiencing freezing temperatures, insulating exposed pipes becomes crucial to prevent pipe bursts caused by frozen water expanding within them. By using materials like foam pipe sleeves or heat tape on pipe joints, the risk of leaks due to freezing can be significantly reduced. Contact New West Plumbing for Expert Solutions on Hidden Pipe Leaks!Understanding the various types of leaks and detection methods is essential when trying to locate hidden pipe leaks. Employing visual inspection techniques or advanced tools such as thermal imaging cameras or acoustic leak detectors increases the chances of early detection and leads to faster repairs. Food coloring tests or meter tests offer additional methods for locating hidden leaks, though it is important to recognize their limitations and seek professional assistance as necessary. Utilizing preventive measures such as regular inspections and maintenance schedules, as well as insulation in colder regions, homeowners can reduce the likelihood of hidden pipe leaks occurring. By promptly addressing issues - with professional assistance as necessary - homeowners not only save water but also secure their properties against future issues. For expert assistance in dealing with hidden pipe leaks, don't hesitate to contact New West Plumbing. Serving New Westminster, BC, for residential and commercial plumbing needs, we're here to help you keep your property in top shape. 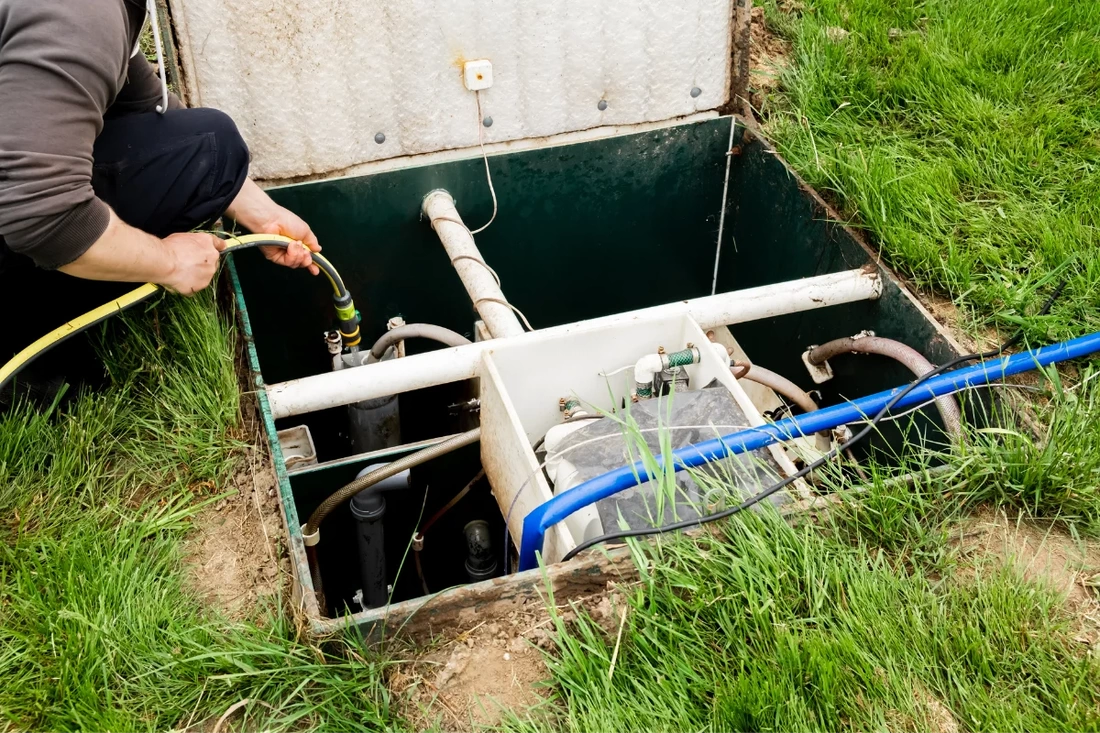
Familiarizing oneself with the nuances of septic systems, including items that should not be placed in a tank, is critical for sustaining its performance and durability. These complex units require careful handling and knowledge about what can disrupt their delicate balance. This post will delve into how septic systems work and highlight the essential role bacteria play within your septic tank. We'll also discuss common misconceptions about these systems that could lead to costly repairs or total system failure. The type of soil surrounding your drain field significantly impacts your system's efficiency - an aspect often overlooked by many homeowners. Moreover, we've compiled a comprehensive list of items you should never flush into your septic tank to avoid clogging pipes or killing beneficial bacteria necessary for breaking down solid waste. Understanding Your Septic SystemYour septic system is like a delicate garden - it needs the right balance of bacteria to thrive. Flushing the wrong things down the toilet can upset this balance and lead to costly repairs. How does a septic system work?Wastewater enters the septic tank, where solid waste settles and oil and grease float. The middle layer flows out to the drain field for further treatment by soil-based microorganisms. The Role of Bacteria in your septic tankBacteria break down solids and keep your system functioning properly. Show them kindness, and they'll repay you in kind. Consequences of an unhealthy septic systemA disrupted bacterial balance can lead to clogs, backups, foul odors, or even complete system failure. Plus, untreated sewage leaks can pose serious health risks. Remember, prevention is key. Avoid flushing harmful products down the drain and maintain a healthy bacterial balance for a happy septic system. Septic System Myths: Debunked.Don't accept all that you hear about septic systems without question. Let's set the record straight on some common misunderstandings. Myth #1: Anything Can Go Down the DrainFalse. Flushing non-biodegradable wipes or cooking grease down the drain can cause serious damage to your septic system. Stick to human waste and toilet paper. Myth #2: More Water is BetterNot true. Excessive water use can overwhelm your septic tank and lead to premature failure. Don't drown your system. a Myth #3: Dead Animals Belong in the TankWho came up with this one? Flushing dead animals into your septic tank can disrupt its functionality and introduce harmful pathogens. Please stick to the basics and leave the fish out of it. Soil Type's Impact on Your Septic SystemThe dirt around your septic system is a big deal. The right soil can ensure your wastewater is purified and clean water is returned to the environment. Why the Right Soil Type Matters for Your Drainfield AreaThe drain field area, also known as the leach field or disposal field, needs specific soil types to work well. Sandy soils are ideal because they drain well and filter properly. Clay-based soils may not be suitable because they compact and reduce permeability. A good drainfield eliminates contaminants from wastewater before it reaches groundwater sources or nearby bodies of water. Comprehending the soil makeup when setting up or caring for a septic system is essential. How Soil Type Affects Wastewater PurificationSoil interacts with wastewater differently, which affects how well pollutants are removed during percolation. Different soil types have different effects:
To keep your septic system working well, schedule regular maintenance checks with professionals like those at New West Plumbing. They can assess whether your current setup aligns with local environmental conditions, including soil type considerations. Top 10 Products to Avoid Flushing into Your Septic TankYour septic system is a delicate ecosystem that relies on a balance of bacteria to break down waste. Here are ten household items you should avoid flushing into your septic tank:
Need Septic Tank Assistance?Don't be a septic system saboteur! Keep your tank healthy by avoiding flushing non-biodegradable wipes, cooking grease or oil, feminine hygiene products, diapers (cloth, disposable, "flushable"), pharmaceuticals, cigarette butts, dental floss, paper towels, cat litter, and household chemicals. Remember: Your drainfield area's effectiveness depends on the soil type, so keep harmful waste out of your septic system to prevent costly repairs or replacements and keep your home safe.If you need any assistance regarding your septic system, contact New West Plumbing for a free estimate. We are available 24/7 providing plumbing services in Burnaby, New Westminster and Coquitlam. FAQs in Relation to List of Things Not to Put in Septic TankWhat not to flush down your septic tank:Avoid flushing non-biodegradable wipes, cooking grease, feminine hygiene products, diapers, pharmaceuticals, cigarette butts, dental floss, paper towels, cat litter, and household chemicals into your septic tank. Is Dawn dish soap safe for septic tanks?Dawn dish soap is generally safe for septic systems as it is biodegradable, but excessive use can disrupt the bacterial balance. (source) What can damage a septic system?Non-biodegradable items and harsh chemicals can kill beneficial bacteria necessary for breaking down waste and damage your septic system. (source) Is bar soap bad for septic systems?Most bar soaps are biodegradable and won't harm your septic system. Choose eco-friendly options when possible. (source) |
 RSS Feed
|
New West Plumbing
Servicing Areas:
|
|